Migrating from Pterodactyl
This guide will show you how to migrate from your old Pterodactyl Panel, to your new Calagopus Panel.
What will be migrated?
Basically everything EXCEPT API Keys generated by Pterodactyl, due to Calagopus using a different format than Pterodactyl, both not reversible.
Prerequisites
To migrate from Pterodactyl, you must have:
- Your Dockerized Pterodactyl's .env file ready. This guide assumes you have Pterodactyl's Docker Compose file, but you can also use Blueprint's Docker Compose file.
- Calagopus Panel installed, but not fully configured (stop at the OOBE)
Installation
If you haven't already so, install Calagopus Panel first using this guide. Once you have installed Calagopus Panel, and arrived to the OOBE, continue following this guide.
DO NOT PROGRESS THROUGH THE OOBE!
This guide requires a fresh database because we need to replace it with our old data. If you finished the OOBE, you will need to delete the database. Once you arrived to the following image below, close the tab and continue following this tab. 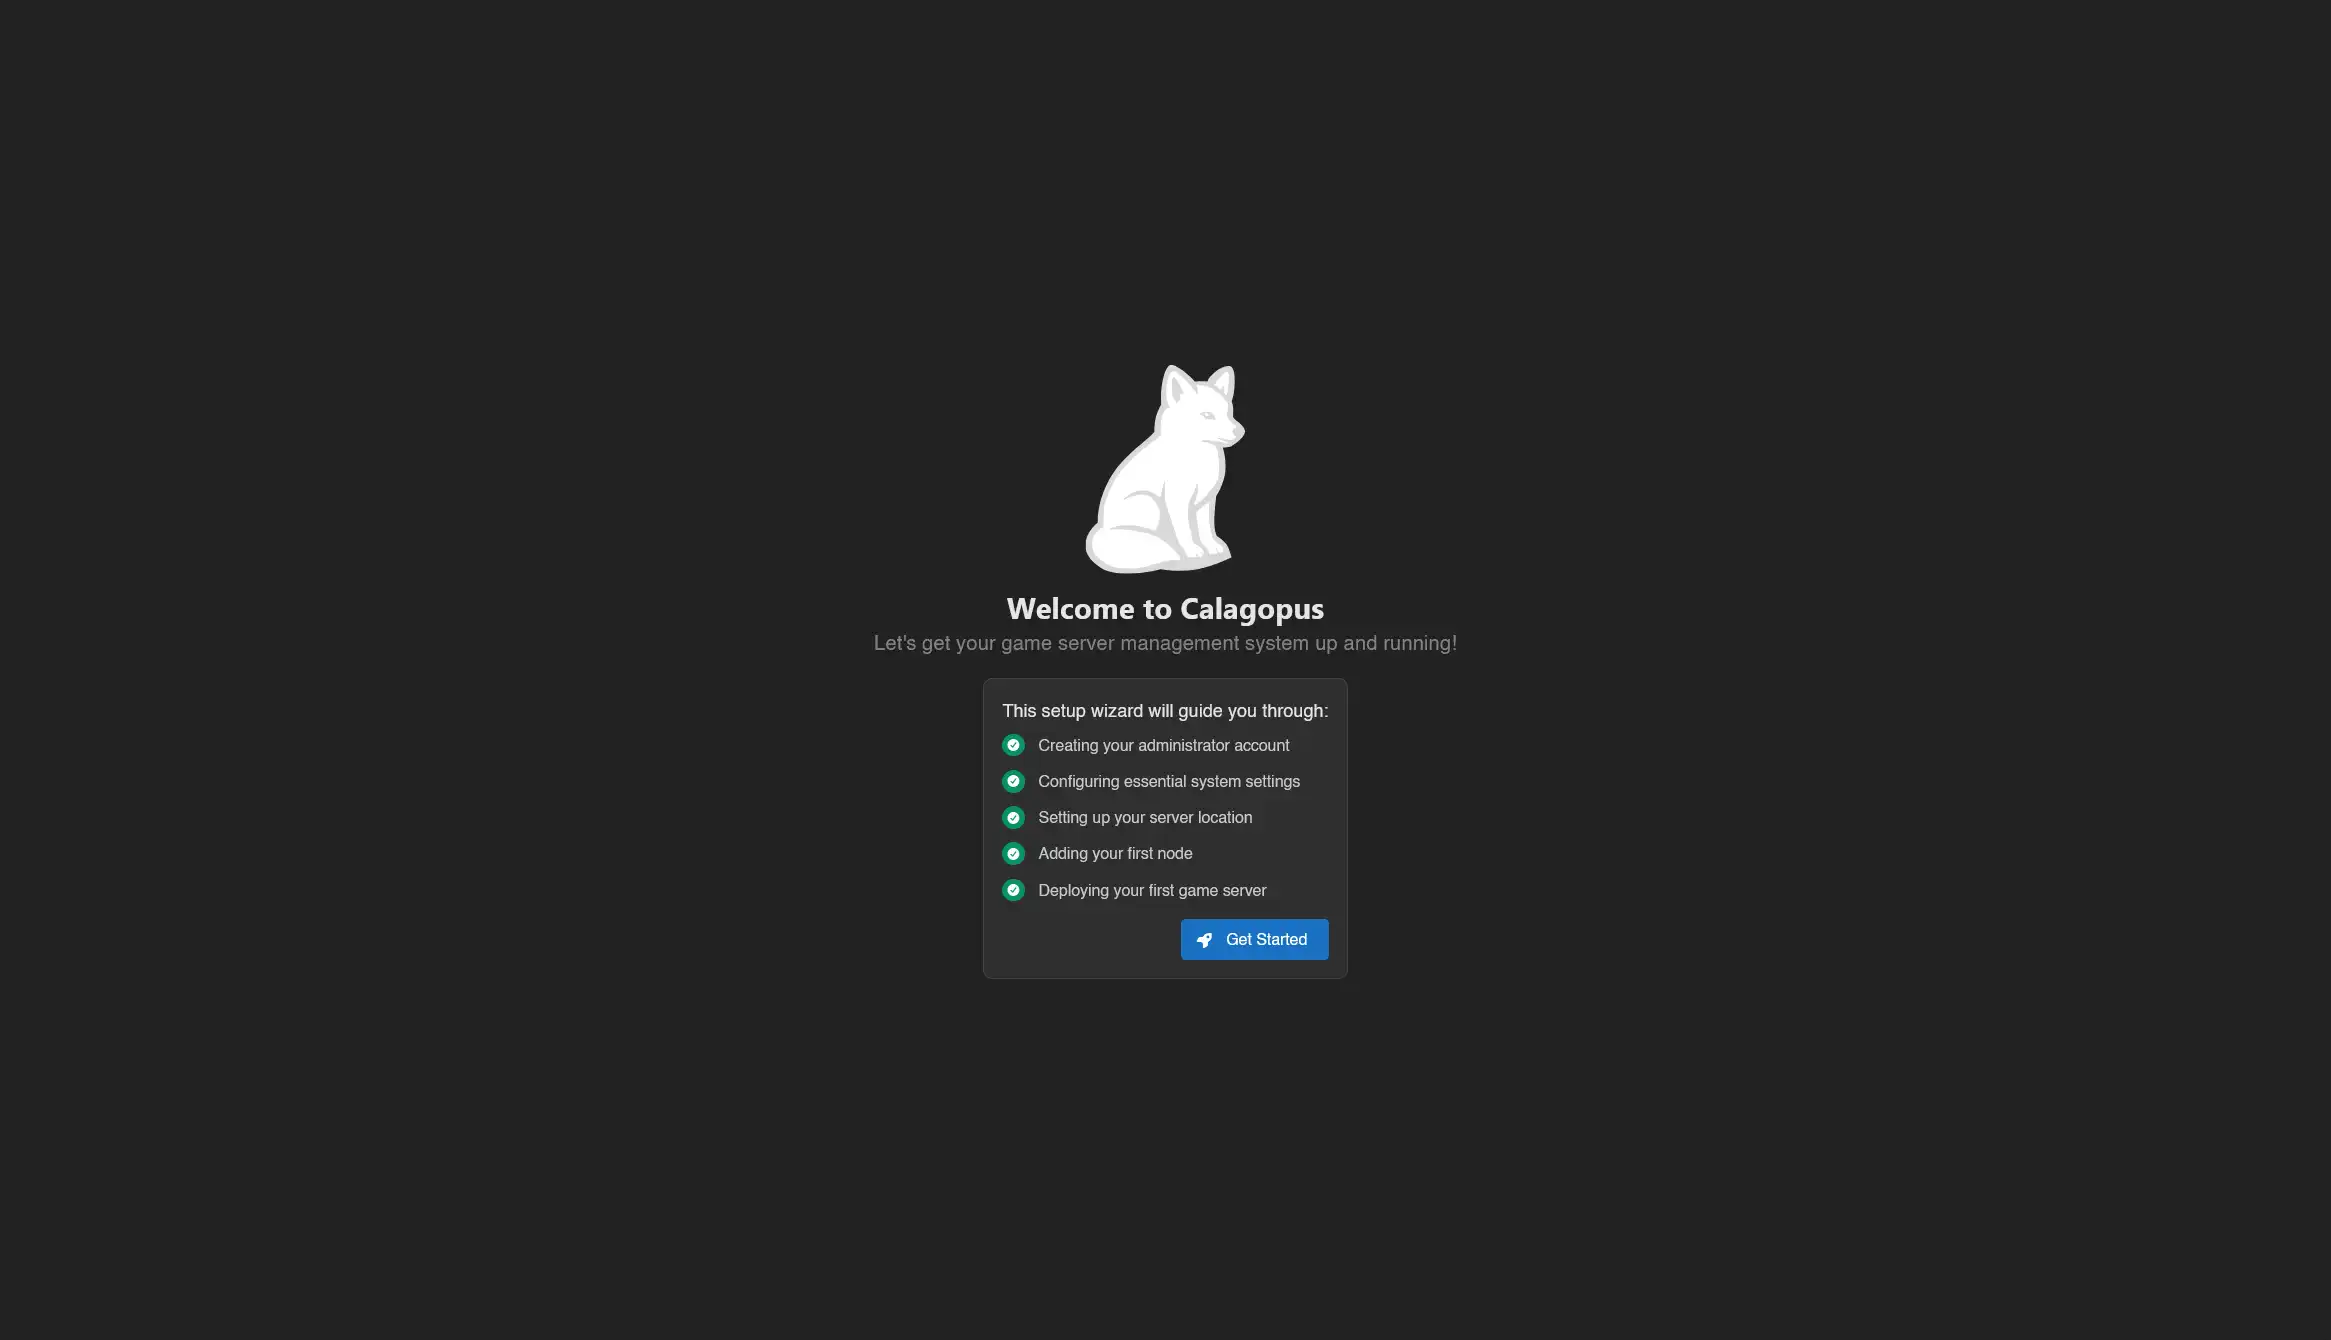
How to delete the database?
Head to the directory where the compose file is, then stop Calagopus:
docker compose downThen, nuke the database:
# We're nuking the database because we need to replace it with our old data
rm -r postgres
Finally, start Calagopus again:
docker compose upFirst, define your Pterodactyl directory using the PTERODACTYL_DIRECTORY variable. This is not needed for this guide, but useful for this guide. If your Pterodactyl's host mount isn't located at /srv/pterodactyl, change the path of the command below.
# Use this command to set a $PTERODACTYL_DIRECTORY variable
# for use later in this guide.
export PTERODACTYL_DIRECTORY=/srv/pterodactyl
Depending of how you installed Calagopus, instructions have been seperated into 2 seperate tabs to adapt to your installation. Please select the installation method you used to install Calagopus.
Making the .env file
WARNING
This step requires you to navigate to your Dockerized Pterodactyl folder where it should contain your docker-compose.yml file and/or your .env file.
To import data from Pterodactyl, you need all 6 of theses variables: APP_URL, APP_KEY, DB_HOST, DB_PORT, DB_DATABASE, DB_USERNAME and DB_PASSWORD. You can find theses variables pretty easily either via your Pterodactyl docker-compose.yml file, or via your Pterodactyl's .env file.
Open a notepad where you will be storing the variables, you will be needing it later to actually create the .env file. It should look similar to this:
APP_URL=http://127.0.0.1
APP_KEY=xc5QXq4u3Qgi3zRP0Q9qq32mnZvl0lVY
DB_HOST=172.20.0.4
DB_PORT=3306
DB_DATABASE=panel
DB_USERNAME=pterodactyl
DB_PASSWORD=mZCcs8KInMWexDRe704T6C8swXmbP8W2M+kCpbnQuv4=
APP_URL
The APP_URL is your existing Pterodactyl's domain, setup either in the docker-compose.yml file, or in the .env file of Pterodactyl. An example value could be:
APP_URL=https://ptero.local.testAPP_KEY
To find APP_KEY, run the following command:
cat $PTERODACTYL_DIRECTORY/var/.envCopy the output that the command gave you and paste it to your notepad. An example value could be:
APP_KEY=xc5QXq4u3Qgi3zRP0Q9qq32mnZvl0lVYDB_HOST
To find your DB_HOST, run the following command at the directory where your Pterodactyl is located:
# On Linux/MacOS
echo "DB_HOST=$(docker inspect -f '{{range .NetworkSettings.Networks}}{{.IPAddress}}{{end}}' $(docker compose ps -q database))"

# On Windows, instead run the command below:
echo "DB_HOST=$($(docker compose ps -q database) | foreach { docker inspect -f '{{range .NetworkSettings.Networks}}{{.IPAddress}}{{end}}' $_ })"
Copy the output that the command gave you and paste it to your notepad. An example value could be:
DB_HOST=172.29.0.4DB_PORT, DB_DATABASE and DB_USERNAME
The DB_PORT can be set to 3306 if you haven't modified the default compose file, same thing with DB_DATABASE that can be set to panel, and DB_USERNAME that can be set to pterodactyl. An example value could be:
DB_PORT=3306
DB_DATABASE=panel
DB_USERNAME=pterodactyl
DB_PASSWORD
To find your DB_PASSWORD, locate for an environment variable in either your docker-compose.yml file or in your .env file named MARIADB_USER_PASS, and copy the value. For example, you may get something like:
MARIADB_USER_PASS=mZCcs8KInMWexDRe704T6C8swXmbP8W2M+kCpbnQuv4=Replace MARIADB_USER_PASS with DB_PASSWORD, and paste it to your notepad. An example value could be:
DB_PASSWORD=mZCcs8KInMWexDRe704T6C8swXmbP8W2M+kCpbnQuv4=Once you have all 6 of the environment variables on your notepad, head to the Calagopus directory with the compose.yml file, and create a new file using your favorite text editor named ptero.env, where you can paste the contents of the notepad.
Importing data
Once your ptero.env file has been created, check if it exists, then run this command:
docker compose cp ptero.env web:/.envThen, simply run the migration command:
docker compose exec web panel-rs import pterodactyl --environment /.envThis command will start migrating all of your users, servers, nodes, etc, which may take a while. Once it's done migrating, simply restart the container:
docker compose down
docker compose up -d
Login with your existing Pterodactyl credentials, and you should be all set!
Making the .env file
WARNING
This step requires you to navigate to your Dockerized Pterodactyl folder where it should contain your docker-compose.yml file and/or your .env file.
To import data from Pterodactyl, you need all 6 of theses variables: APP_URL, APP_KEY, DB_HOST, DB_PORT, DB_DATABASE, DB_USERNAME and DB_PASSWORD. You can find theses variables pretty easily either via your Pterodactyl docker-compose.yml file, or via your Pterodactyl's .env file.
Open a notepad where you will be storing the variables, you will be needing it later to actually create the .env file. It should look similar to this:
APP_URL=http://127.0.0.1
APP_KEY=xc5QXq4u3Qgi3zRP0Q9qq32mnZvl0lVY
DB_HOST=172.20.0.4
DB_PORT=3306
DB_DATABASE=panel
DB_USERNAME=pterodactyl
DB_PASSWORD=mZCcs8KInMWexDRe704T6C8swXmbP8W2M+kCpbnQuv4=
APP_URL
The APP_URL is your existing Pterodactyl's domain, setup either in the docker-compose.yml file, or in the .env file of Pterodactyl. An example value could be:
APP_URL=https://ptero.local.testAPP_KEY
To find APP_KEY, run the following command:
cat $PTERODACTYL_DIRECTORY/var/.envCopy the output that the command gave you and paste it to your notepad. An example value could be:
APP_KEY=xc5QXq4u3Qgi3zRP0Q9qq32mnZvl0lVYDB_HOST
To find your DB_HOST, run the following command at the directory where your Pterodactyl is located:
# On Linux/MacOS
echo "DB_HOST=$(docker inspect -f '{{range .NetworkSettings.Networks}}{{.IPAddress}}{{end}}' $(docker compose ps -q database))"

# On Windows, instead run the command below:
echo "DB_HOST=$($(docker compose ps -q database) | foreach { docker inspect -f '{{range .NetworkSettings.Networks}}{{.IPAddress}}{{end}}' $_ })"
Copy the output that the command gave you and paste it to your notepad. An example value could be:
DB_HOST=172.29.0.4DB_PORT, DB_DATABASE and DB_USERNAME
The DB_PORT can be set to 3306 if you haven't modified the default compose file, same thing with DB_DATABASE that can be set to panel, and DB_USERNAME that can be set to pterodactyl. An example value could be:
DB_PORT=3306
DB_DATABASE=panel
DB_USERNAME=pterodactyl
DB_PASSWORD
To find your DB_PASSWORD, locate for an environment variable in either your docker-compose.yml file or in your .env file named MARIADB_USER_PASS, and copy the value. For example, you may get something like:
MARIADB_USER_PASS=mZCcs8KInMWexDRe704T6C8swXmbP8W2M+kCpbnQuv4=Replace MARIADB_USER_PASS with DB_PASSWORD, and paste it to your notepad. An example value could be:
DB_PASSWORD=mZCcs8KInMWexDRe704T6C8swXmbP8W2M+kCpbnQuv4=Once you have all 6 of the environment variables on your notepad, head to the /etc/calagopus directory or where your Calagopus's .env file is located, and create a new file using your favorite text editor named ptero.env, where you can paste the contents of the notepad.
Importing data
Once your ptero.env file has been created, check if it exists under the /etc/calagopus directory or where your Calagopus's .env file is located, and then run this command:
calagopus-panel import pterodactyl --environment ptero.envThis command will start migrating all of your users, servers, nodes, etc, which may take a while. Once it's done migrating, simply restart Calagopus:
# Linux
systemctl restart calagopus-panel

# MacOS
# soon

# Windows
nssm restart "Calagopus Panel"
Login with your existing Pterodactyl credentials, and you should be all set!